

There are two ways to turn a paper or PDF drawing into a CAD file with HP Build Workspace. On the HP DesignJet T2600 and T2600dr MFP Plus Edition, you scan and vectorize in one step from the front panel. With any other scanner or an existing PDF, you upload the file in your browser and click AI Vectorization. Either way, previewing is free and a token is only used when you accept and download. Here is each step, through to finishing the drawing in AutoCAD or ZWCAD.
1. Get the Drawing | 2. Vectorize | 3. Finish in CAD |
HP's short video shows the upload, vectorize and review workflow:
Before You Start: What You Need
Item |
Why It Matters |
| An HP Build Workspace account | Cloud-based, so there is nothing to install. New to it? Start with our guide on how to use HP Build Workspace. |
| Tokens for downloading | From December 2026, every new HP DesignJet MFP except the T830 24in, and every T1600 Plus series printer, comes with free 1-year access with 20 tokens a month. A Workspace Admin activates it under Accounting by clicking Redeem now on the Tokens page and entering the printer serial number, or DPI can do it for you. Otherwise, buy a prepaid package from DPI. |
| Internet on the printer (Method A) | Scans go straight to the cloud. If the printer is offline, the front panel asks you to connect. |
| A smartphone (Method A) | Used to authenticate, which temporarily links the printer to your HP Build Workspace account. |
| CAD software | The result downloads as a DXF file that opens in AutoCAD, ZWCAD and other CAD programs. HP AI Vectorization does not include a CAD licence. |
Government departments and agencies should check eligibility with DPI before ordering.
Step 1: Get Your Drawing Into HP Build Workspace
Start with the source drawing. There are two ways to get it into HP Build Workspace: Method A scans and uploads in one step from the HP DesignJet T2600 or T2600dr MFP Plus Edition, and Method B works with any scanner, PDF or image file.
Method A: One-Step Scan From the HP DesignJet T2600 MFP Plus Edition
The front-panel Scan to AI Vectorize and Scan to HP Build Workspace workflows are only on the HP DesignJet T2600 MFP PostScript Plus Edition and the dual-roll T2600dr MFP PostScript Plus Edition (Build Connected). Other HP MFPs do not support this integration, so use Method B with them.
| 1 | Load the drawing into the integrated 36-inch scanner as for a normal scan. |
| 2 | Choose the workflow on the touchscreen. Pick Scan to AI Vectorize to get a CAD file, or Scan to HP Build Workspace if you only want the scanned copy stored in the platform. |
| 3 | Authenticate with your phone. Follow the prompt on the front panel and sign in to your HP Build Workspace account on your phone. The phone connects to the HP Build Workspace cloud, not to the printer, so the two can be on different networks as long as both are online. |
| 4 | Scan. The printer uploads the scan to your account, where it lands in Scan Drafts. With Scan to AI Vectorize, vectorization is started for you, with no separate upload step. |
| 5 | Pick it up on your computer. Sign in to HP Build Workspace in a browser, open Scan Drafts and continue from Step 2 below. |
Method B: Any Scanner, PDF or Image File
Use this with the HP DesignJet T850 MFP, T950 MFP, any other scanner, or an old PDF from a consultant.
| 1 | Scan as usual. Save the scan to a file, USB drive, network folder or email, or start from an existing PDF or image of the drawing. |
| 2 | Upload to HP Build Workspace. Sign in from your browser, open the project the drawing belongs to (or create one) and upload the file. Then carry on with Step 2. |
Step 2: Vectorize the Drawing in HP Build Workspace
Everything in this step happens in your web browser. HP Build Workspace is cloud-based, so there is nothing to install and no heavy software running on your PC. Viewing, checking and editing the result are free. A token is only used when you accept and download.
| 2.1 | Sign in and open your project. Sign in to HP Build Workspace. The home page shows all your projects, so you can keep track of every job and open its drawings from anywhere. Open the project that holds the drawing you want to convert. |
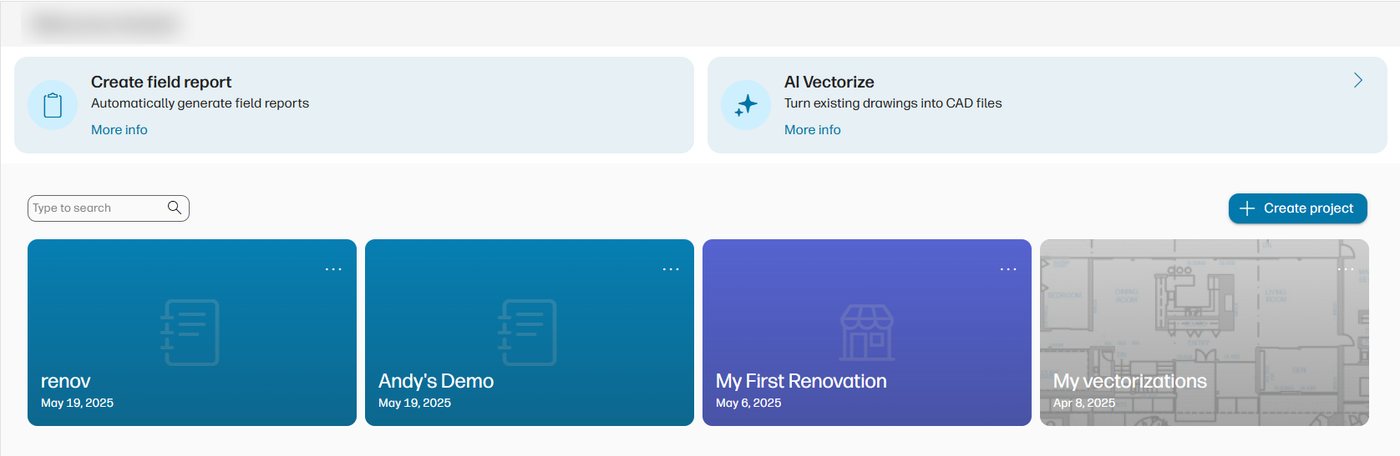
The home page: your projects, plus an AI Vectorize shortcut
| 2.2 | Open the drawing and click AI Vectorize. Open the scanned drawing or PDF and click AI Vectorize at the top right. It is one click, with no settings to tune. Processing runs in HP's cloud, so you can carry on working while you wait; the file is usually ready in about 15 minutes. When it is done, click Go to vectorized file in the side panel. If you used Scan to AI Vectorize on the printer (Method A), vectorization has already started, so skip to step 2.3. |
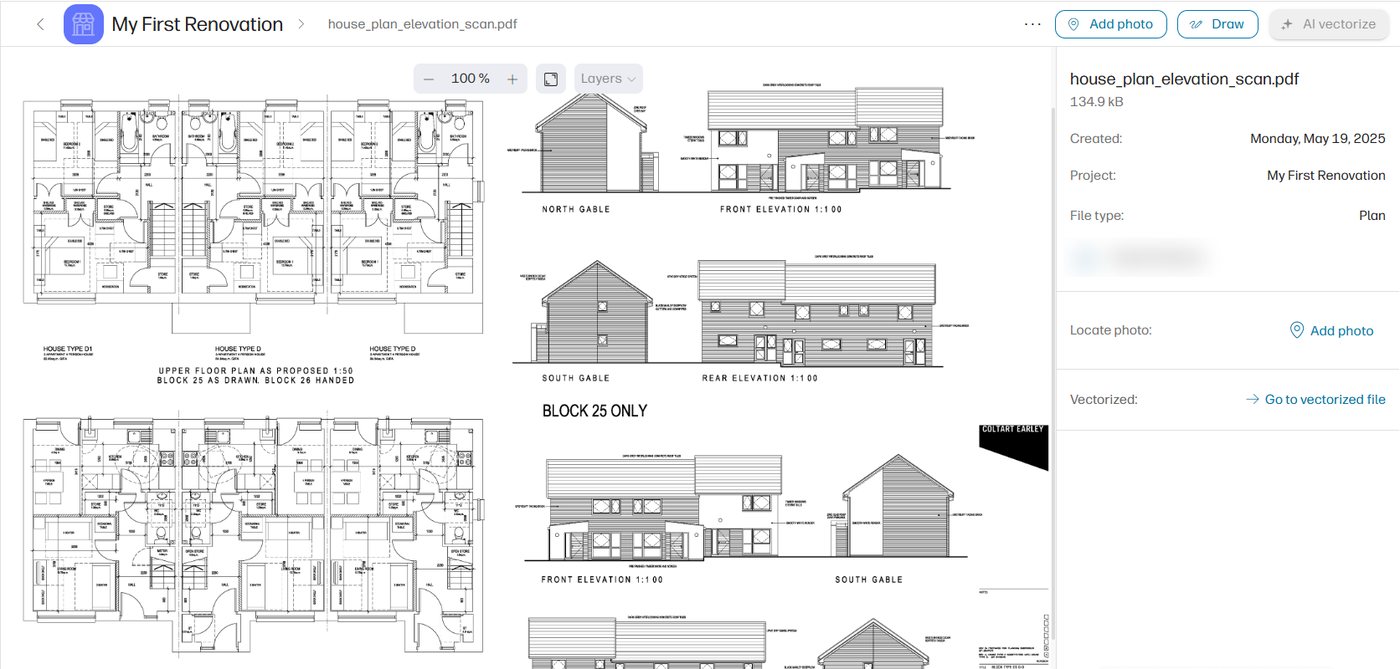
The original scan, with AI Vectorize at the top right and Go to vectorized file in the side panel
| 2.3 | Open the vectorized file and compare it with the original. Open the Layers list and turn off all the layers. What is left is the original drawing, kept underneath as a background, so you can compare it with the new linework and spot anything missing. HP's figure of up to 80% less drafting time (based on HP internal pilot studies with over 1,000 customer drawings, compared with manual redrawing) means some finishing work always remains. Savings vary with drawing complexity and image quality. |
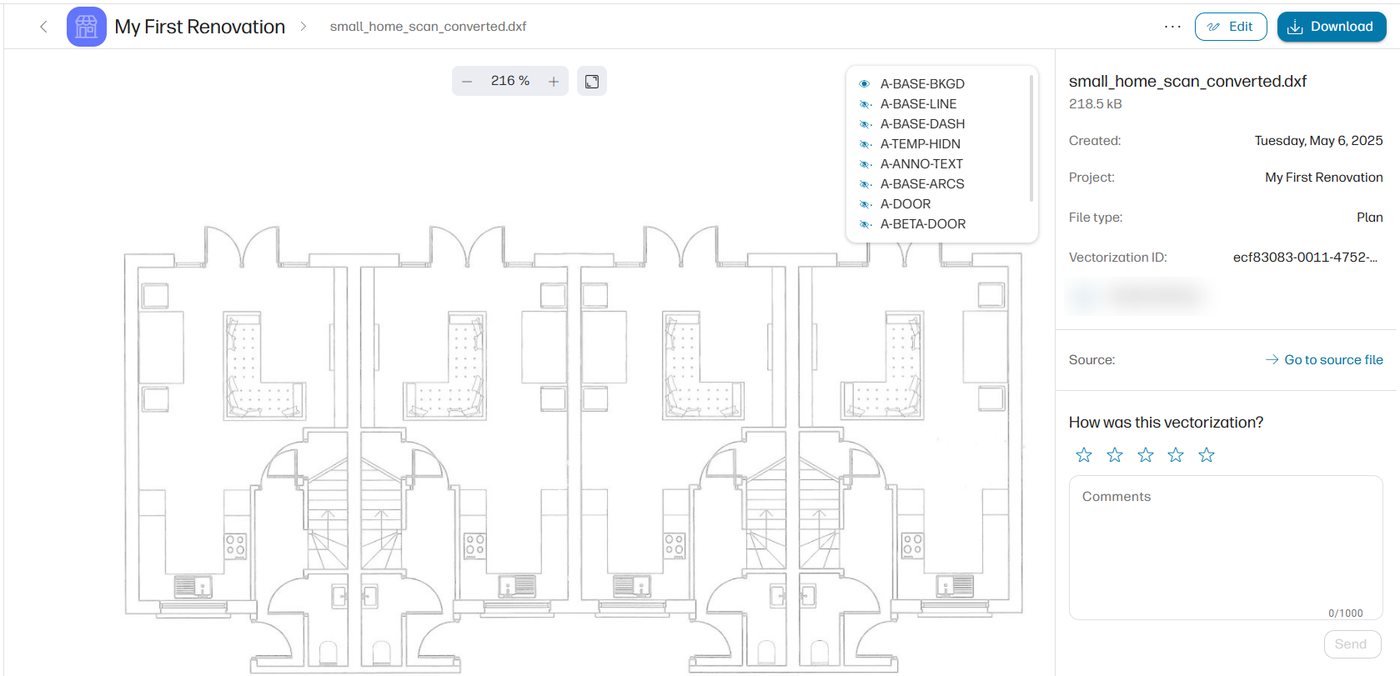
Layers switched off: only the original background is showing
| 2.4 | Turn the layers on one by one. HP AI Layer Separation sorts the drawing into layers such as base lines (A-BASE-LINE), dashed lines (A-BASE-DASH), arcs (A-BASE-ARCS), text (A-ANNO-TEXT), doors (A-DOOR) and windows (A-WIND). Switch them on one at a time to check each type of object. Because doors, windows and text are already on their own layers, you save more drafting time and finishing the drawing in CAD goes more smoothly. |
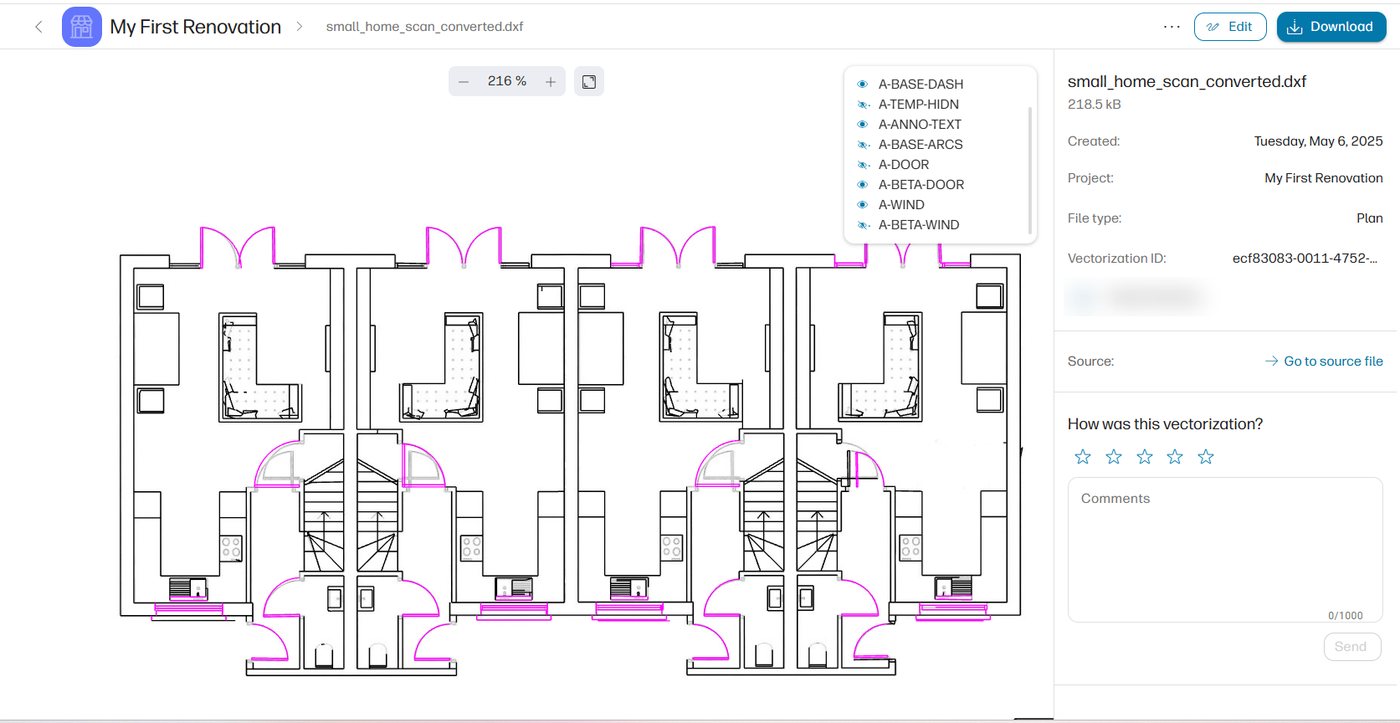
Layers switched on, with doors and windows on their own layers
| 2.5 | Make quick fixes in the editor. Click Edit to open the built-in editor. Use the select, draw and erase tools to remove stray lines or add missing ones, with undo and redo if you change your mind. You can also delete a whole layer you do not need. Small corrections like these need no AutoCAD. |
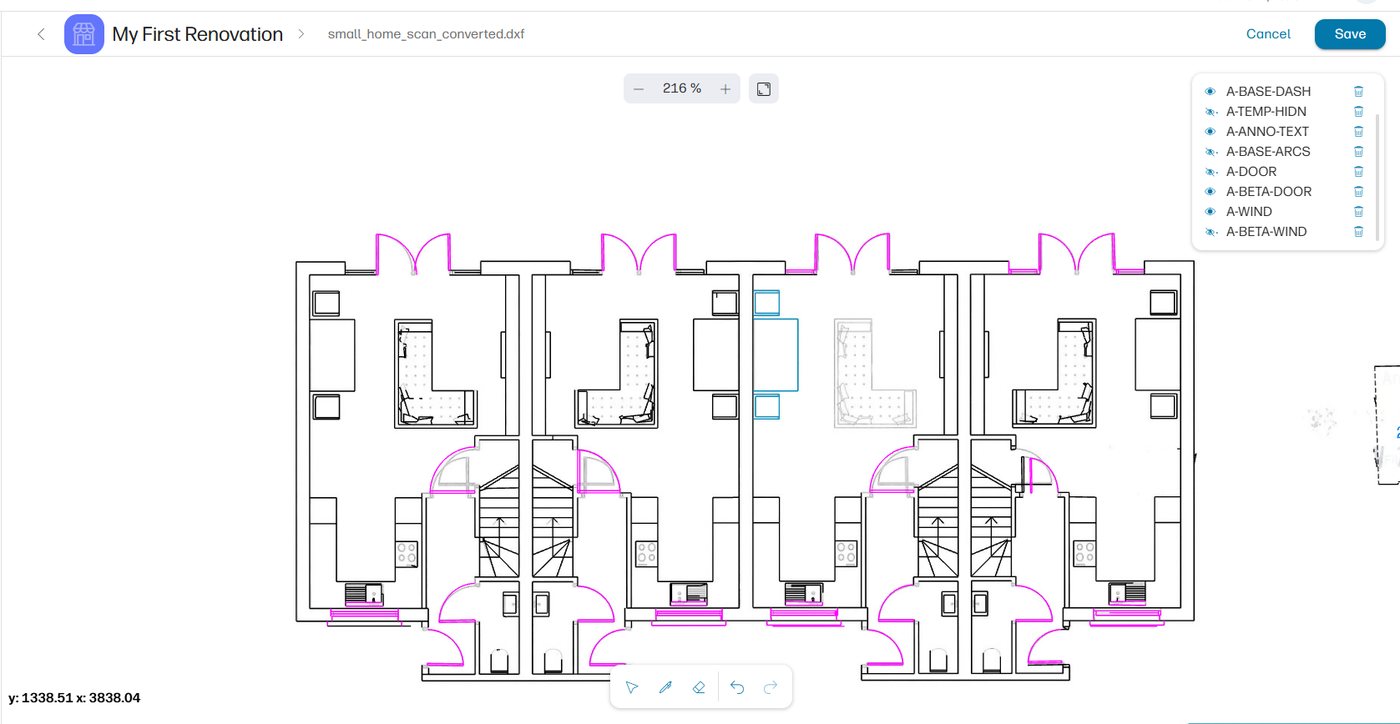
The editor: select and delete lines without opening CAD software
| 2.6 | Save your edits. Click Save. The edited file stays in the project, ready to download. You can also rate the vectorization and leave a comment for HP in the side panel. |
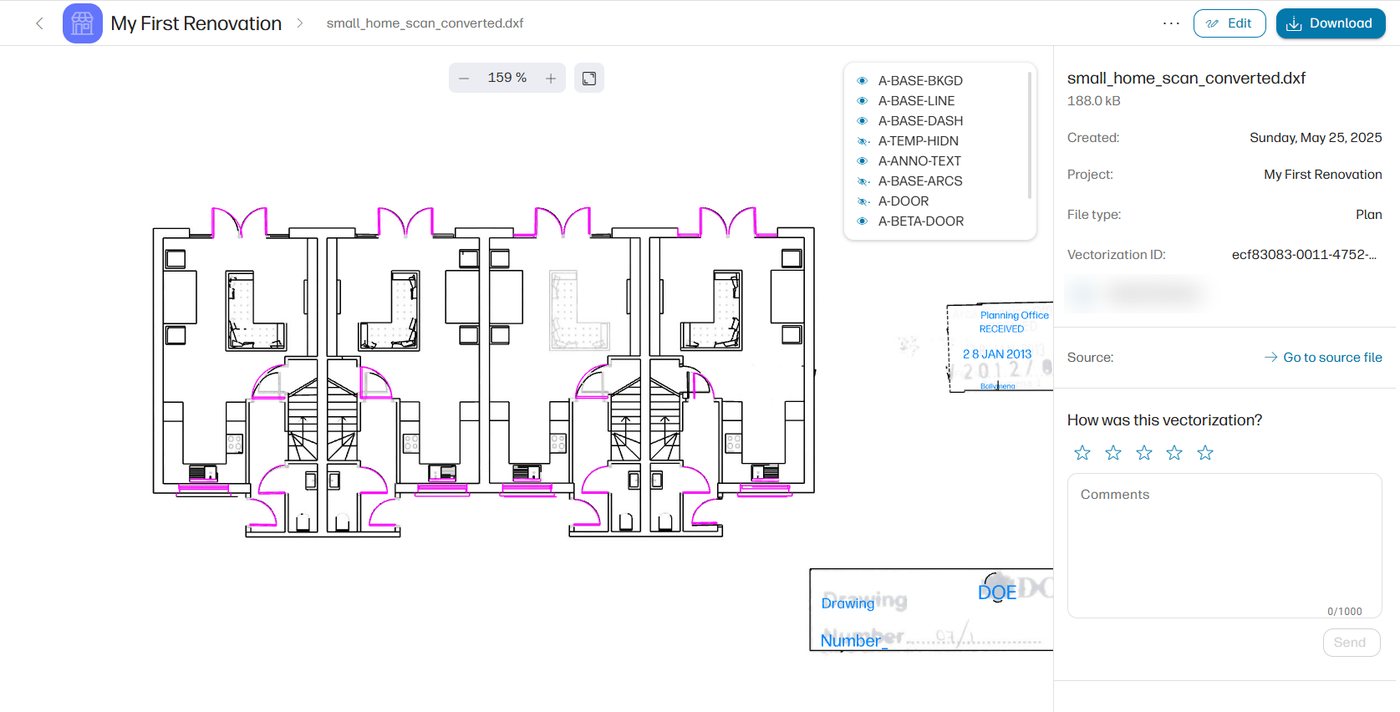
The edited file, saved in the project
| 2.7 | Accept and download the DXF (1 token). Happy with the result? Click Download. Accepting and downloading or sharing a result for the first time uses one token, whatever the file size. After that, the file is unlocked for the project, so any project member can download it again without using another token. The file is a DXF, chosen by HP so it opens in most CAD software. Out of tokens? Click Get More Tokens and the request goes to your reseller. Annual Access tokens expire monthly; prepaid tokens last one year. Read HP AI Vectorization tokens explained for the full rules. |
| 2.8 | Share the project with your team. Click Invite, type a colleague's email and click Send invite. Collaborators can view all the project's files but can only edit the ones they create, so everyone works from the same drawings. |
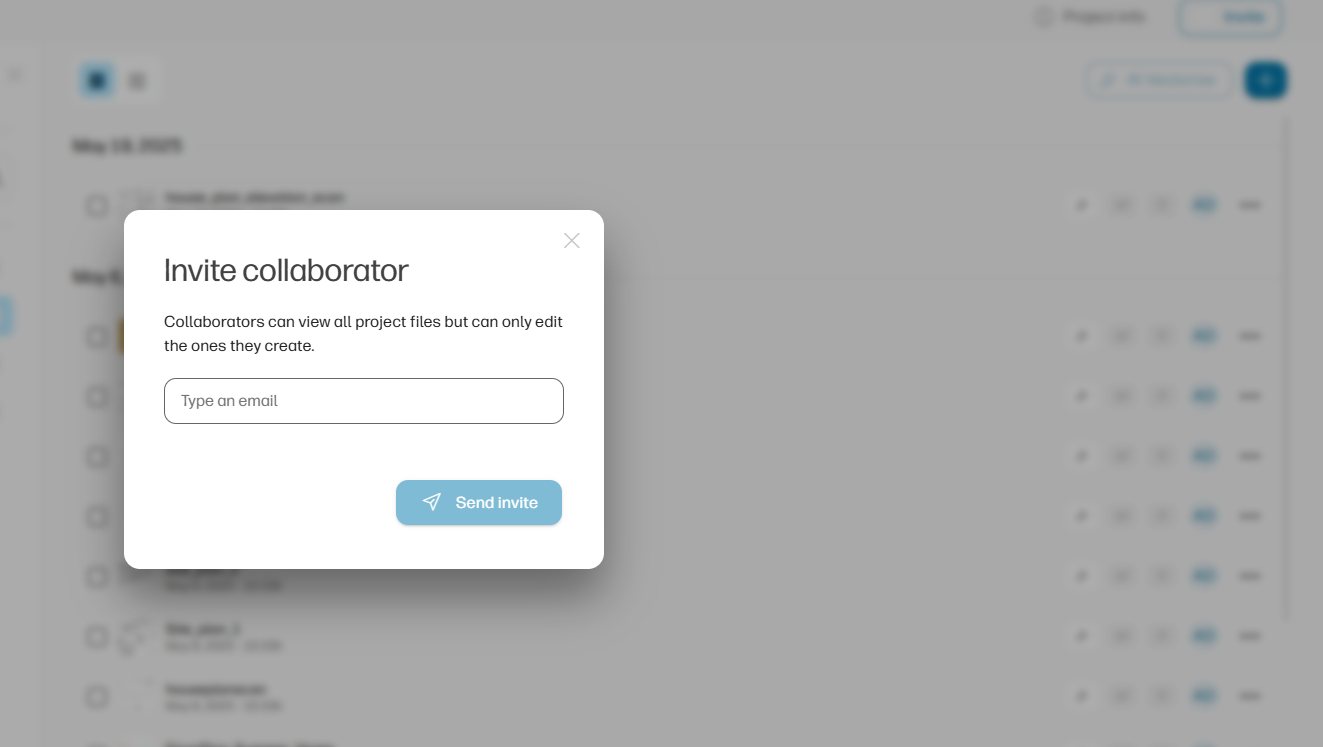
Invite a collaborator by email
Step 3: Open in AutoCAD or ZWCAD and Finish the Drawing
| 1 | Open the DXF and save it as DWG in AutoCAD, ZWCAD or your usual CAD program. |
| 2 | Check the scale. As good practice with any scanned drawing, measure a known dimension, such as a grid line or door width, and scale the drawing if it does not match. |
| 3 | Complete the gaps. Use the Layer 0 underlay to trace anything the AI missed, and proofread recovered text, especially dimensions and room labels. |
| 4 | Tidy up and upload. Rename layers to your office standard, freeze or remove the underlay when you are done, and upload the finished drawing back to the project as a new version. |
Scanning Tips for Better Results
HP says results depend on drawing complexity and image quality, and the AI automatically cleans up aged or degraded drawings. HP does not publish recommended scan settings, so these tips are general good practice, not HP specifications.
Factor |
Good Practice |
| Resolution | Use a resolution where the smallest text and thinnest lines stay sharp when zoomed in. Avoid blurry photos or heavily compressed PDFs if a better original exists. |
| Colour mode | Pick a mode that keeps faint lines and coloured markups visible. If black-and-white drops light lines, try greyscale or colour. |
| Straightness | Feed the sheet square to the scanner so walls and grid lines come out straight, not slightly rotated. |
| Clean originals | Remove staples, tape and sticky notes, flatten folds and keep the scanner glass clean. |
How DPI Helps
DPI Technology has supplied and serviced HP DesignJet plotters in Malaysia for more than 20 years. We can set up your account, link it to DPI for token requests, activate your free access and show your team both methods on your own drawings. If you scan many legacy plans, the T2600 MFP Plus Edition saves the separate upload step; if you vectorize occasionally, any MFP in our multifunction plotter range plus a browser upload is enough. See the benefits of HP AI Vectorization or our HP Build Workspace page, and ask DPI for current prepaid package pricing.
Frequently asked questions
Can I scan to AI Vectorize from any HP DesignJet MFP?
No. The front-panel Scan to AI Vectorize and Scan to HP Build Workspace workflows are only on the HP DesignJet T2600 and T2600dr MFP Plus Edition. With other MFPs, such as the T850 or T950, scan to a file as usual, then upload it to HP Build Workspace in your browser and run AI Vectorization there.
Why do I need my phone to scan to HP Build Workspace?
The phone is used to authenticate. Signing in on your phone temporarily links the T2600 MFP Plus Edition to your HP Build Workspace account, so the scan goes to the right place. The phone connects to the HP Build Workspace cloud, not to the printer, so the two can be on different networks.
Does the printer need an internet connection?
Yes. The T2600 MFP Plus Edition needs internet access to send scans to the cloud. If it is not connected when you start either workflow, the front panel shows a message asking you to connect. Your phone only needs its own internet connection, on any network.
Do I pay to see the vectorized result?
No. Vectorizing and previewing are free. One token is used only when you accept the result and download or share it for the first time, regardless of file size. After that, the file is unlocked and any project member can download it again without using another token.
What file do I get, and will it open in AutoCAD or ZWCAD?
You download a DXF file, which opens in AutoCAD, ZWCAD and most other CAD software. The original scan stays on Layer 0 for comparison, and the vectorized lines, text, doors and windows are separated into layers. HP AI Vectorization does not include a CAD software licence.
Sources: HP Build Workspace customer and partner FAQs, HP Build Workspace official messaging (Spring 2026), HP AI Vectorization brochure (June 2026) and HP AI Vectorization how-to-demo guide; DPI Technology update (December 2026). Scanning tips are general good practice, not HP specifications. Features and offers may change; confirm with DPI.